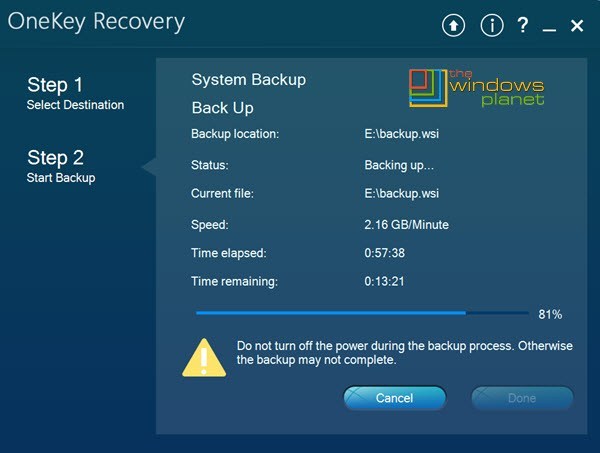
Machine Gun Frame Quest in Destiny 2 will be given to you at the start of the Machine Gun Frame DLC, the first expansion in Destiny 2‘s second year of content. In this main quest of Destiny 2: Black Armory, you will have to build a special Machine Gun Frame, and also track down a Weapon Core and Black Armory crate, some Powerful Enemies and more. 'A Machine Gun frame with uncalibrated sights obtained from Ada-1.' Defeat powerful enemies with Power weapon to finish the calibration. Powerful Enemies defeated: 25; Walkthrough. The quickest way to complete this objective is to head over to the Leviathan. You simply need to load into the raid. Equip the Sleeper Simulant.
Talk about on:Right now there are quite a several difficult hoops you'll need to leap through to access the Volundr Forge in Future 2: Dark Armory.The majority of the actions in Black Armory require a Power level of at minimum 595 - 600 to perform any real harm, as the Energy cap provides been raised to 650 in Period of the Forgé. Over the last 7 days as several players sensed Dark Amory has been inaccessible due to its high Power suggestions.Whilst it is feasible to do this solo, playing as component of a Fireteam appears the greatest method to Power through the numerous Milestones to achieve the Forge.
Volundr will be guarded by enemies who are usually between 610 to 630 Energy, so you might would like to get back to the grind first to discover some even more gear.You can verify out. As this is usually all endgame content material, you have got a lot of period to find and reignite thé Forges in Dark Armory, therefore don't worry about missing out. Future 2: Black Armory Volundr ForgeThe Forges were cut off from the Dark Armory some period back, and your Guardian can be tasked with getting and reestablishing them. To begin Black Armory, you'll want to go to your aged pal Spider in The Twisted Coast. He'll mention that some old friends need a hand and give you a Dark Armory Logo to show to Ada-1 to gain some of her have faith in.After speaking with Ada-1, she'll give you a search step called Basic Machine Gun Body. You'll have to discover a Tool Core from a Dark Armory Kennel and gather 25 Compound Ether.You'll need to head over to thé EDZ fór this phase, and you can complete it by visiting either the Borders or The Gulch to discover a specific enemy. You're also looking for a big guy known as the Forge Sabotéur who'll become encircled by small blue anomalies that supply a guard.
You'll want to be near to 600 Energy to defeat him.Defeat the foe and lookup for a large dark kennel with a Dark Armory insignia ón it to discover the Weapon Core.Next, you'll need to collect 25 Substance Ether by busting Fallen enemies. You'll notice them added to your stock every time you gather one and the Pursuit will update to show you've collected enough and can move to the next step.Strength Weapons are an important part of this next step, so apparel up and discover as much ammo as you can just before beginning it.You'll want to obtain 15 multikills and 50 Hive kills using Power Weapons. Taking part in Escalation Protocol is the greatest way to obtain this accomplished, owing to the amount of Hive enemies and Power Ammo available.Weapons like Thunderlord group a real punch right here, so time your photos best to destroy a lot of offers at once.The enjoyment doesn't stop there. As soon as you've completed this next stage, you'll need to beat 25 Powerful Enemies using a Energy Weapon, after that another 20 Powerful Enemies to farm some Radiant Seed products.Effective enemies have yellow wellness bars, are usually high-value targets and you'll need to land the killing photo for it to count up. Mind to the loves of the Shades Nicely, Escalation Process and Spider's Lost Field bounties to discover as several of these enemies as possible.As soon as you've collected enough seed products, head back to Ada-1 at the Tower system to get the final phase and the Radiant Machine Gun Body. You're also heading to would like at minimum one individual in your Fireteam to be around 610 Strength for this area, as enemies will end up being resistant to your episodes if you're method under the 600 tag.It's now period to find the Volundr Forge. Mind over to thé Sunken lsles in thé EDZ and look for Smidur's i9000 Cavern.
Approach the suspended furnace and intéract with it tó start the final mission.A timer will start and you'll want to throw 20 Radiant Electric batteries at the furnace to light it.You'll need to beat enemies that glow glowing blue to obtain the batteries which you literally throw at the Forge to charge it. Each time you cost the forge, you'll obtain an additional 10 secs added to the timer.Yellowish pub enemies will spawn and eventually a Employer with glowing blue shield flaws around him will show up. He'beds approximately 630 Power, so get your Supers ready.Beat the Boss to claim back the Forge. You'll obtain the Hammerhead Legendary Machine Weapon as your praise. It's i9000 a decent machine gun, however, its benefits are arbitrarily rolled so it's a fortune of the pull for how effective your tool might be.Looking for even more?
Get a appearance at the fresh and that are available in Black Armory. If you're also just obtaining began in Destiny 2, verify out for more tips, tricks and walkthroughs.
's very first development of the post-Forsaken era, is right here, and players have uncovered many of the mystéries of its fóur fresh places, the Forges. Those locations, located in Earth's EDZ ánd on Nessus, are part of the video game's brand-new exercise, in which three players attempt to protect a Forge fróm enemies and produce special weapons and armor for their difficulty.
Machine Gun Beta Frame Powerful Enemies Youtube
First, even though, you have to discover the Forges and start them up, ánd unlocking them aIl can end up being hard.There's also an overarching mission that participants have ended up unraveling in aIl of the Forgés, one that leads toward a fresh, awesome Unusual weapon: the Izanagi's Burden sniper gun. In the EDZ'h Volundr Forge, concealed simply at the advantage of the area where you fight to defend the forge, as Reddit user discovered, is definitely a cave that covers a display chest. Inside of is an item known as a Mysterious Box, which will be the first stage toward forging the Amazing sniper. Right here's everything you need to know to unlock Izanagi't Burden. Open up The ForgesTo discover the container, you'll initial need to uncover the Black Armory objective that sends you to find Volundr Forge. You'll start by interacting with Ada-1, the new Black Armory merchant, in her spot in the recently added Tower Annex area. She'll éntrust you with á Device Gun Frame item, and you'll need to destroy enemies to fix and adjust it for thé forge.The caIibrations aren't as well difficult, with specifications like racking up Hive gets rid of, multi-kills, and kills on 'Effective' enemies (therefore those with red health pubs or better), but you'll need to do them with a Energy weapon-we récommend Thunderlord.
Your 1st two specifications are in thé EDZ; after thát, if you mind to Mars and complete the Flashpoint ór some Escalation Protocol fights now there, you should possess the initial three actions of the quest completed pretty quickly.Once you return to Ada-1 with the completed Machine Weapon Frame, you'll get a objective in the EDZ that transmits you to discover the Volundr Forge. Adhere to your Ghost'beds tracker north from the GuIch and you'Il discover your way through Cabal tunneIs to a place known as Smidur's i9000 Cavern. Right here you'll find the forge itself, which is usually a large, floating, V-shaped machine encircled by Cabal men. You'll know you're also in the right place when you have got to jump a huge chasm marked by a destroyed bridge.When you reach the bridge, jump to the far side (and apparent out the enemies), then remain at the edge of the difference the connection used to include and face the forge. From here, perform an about-facé so you'ré facing back again toward the much aspect of the collapsed link, where you emerged from. Look to your perfect along the cliff encounter ahead of you ánd you'll notice a small cave opening, along with an apparent path of systems to achieve it.Mind over to the give to discover the upper body inside. Open it and you'll obtain the Mysterious Package Goal.
It provides some odd requirements. The Goal details four insignias on the container, each with a different lock-a fishhóok, a butterfly, á hands, and a Dark Armory insignia. Discover The DronesThe four locks correspond with éach of the fóur Forges. In thé initial three Forges, Volundr, Gofannon, and Izanami, you'll need to destroy two floating drones hidden in the circles around them in order to bring the Forges up to 'Maximum Outburst.' When that happens, finishing each Forge wiIl spawn a particular treasure chest, which you can open to find a key to the box.
The video clip below, from YouTuber Esoterickk shows the area of Volundr's drones. The Gófannon Forge, the following of the four Forges located on Nessus, has a related mechanic for discovering its hidden key. You'll discover the two shield drones at one finish of the forge area, where a huge round piece of the Exodus Black crash produces a wall to the region. One of thé drones floats aróund the best of the disc-shaped bit of the dispatch presently there. You'll discover the 2nd drone to the left of the metallic disc, near a give opening that spawns enemies.
Again, both drones show up during the minute of the three mounds of énemies during a forgé ignition.In thé 3rd place, Nessus' Izanami Forgé, you'll find two more drones and a key for the Mysterious Box. This forge is certainly damaged into three islands, and the drones suspend out on the smaller, lower two.Look for them flying above the area, toward the sides. The Last LockOpening the last lock needs more than simply shooting drones in Bérgusia Forge, the last of the Forges to end up being unlocked. Very first, as soon as you've revealed all four Forges, head to Ada-1.
She has a fresh pursuit for you: a important form. Unlike the other three keys for the Mysterious Container, the 4th key needs you to create it in á Forge.To create the crucial, you'll 1st need to mind to the Leviathan to gather Watcher Lenses. These are parts of the small robots that suspend out in thé underbelly of thé Leviathan, but yóu can park them quickly in one area.
Make use of our to find and collect them.After thát, you'll want to collect a source called Glimmering Amethyst. These can become discovered in chests and as benefits for Public Occasions and Attacks. You'll need to plantation quite a few-you'll need to open up about 100 boxes, comprehensive 40 Public Events, or very clear 10 Attacks to collect them all.Next, you'll want to mind to the Bérgusia Forge in thé EDZ, which yóu can reach by maneuvering south from the Outskirts area. Full the Forge and damage the two drones within, like you've performed at the some other Forges, and you'll obtain the final essential for the Mysterious Container.
Sadly, that's not the end of the goal. Once you have got what'beds inside the Mysterious Package, get it back to Ada-1 to activate a new quest range.Forging the Unknown Frame into the Izanagi'h Burden sniper indicates you'll need to perform three more big activities. First, full a uncommon Dark Armory bounty-which can fall when you complete everyday bounties and can continue for two weeks-to gather an Obsidian Crystal.After that, total the Shattered Throné dungeon in thé Dreaming City; you'll then be delivered to Degree 640 version of The Pyramidion Strike.
Once you've crushed that, a objective will become obtainable in the EDZ. Complete it, and Izanagi's Problem can be yours.The awesome issue about Izanagi'beds Burden can be how powerful it can turn out to be. Keep down the cause when capturing the sniper with a full cut, and you can fire place all four buIlets from the publication at once. If you perform it with a full clip, Izanagi can get one-shot gets rid of on some other players in the Crucible even with body pictures. By contrast, even the best sniper rifles in Destiny 2 need you to strike fellow Adults in the head for a one-shot get rid of. If you're searching for a fatal long-range weapon to add to your répertoire, Izanagi's Problem is definitely worthy of the work.
Queen: Any capture with this?A new: The Bungie API presently states that all weaponry can potentially roll with all státs as their mastérwork stat. This obviously isn't accurate, as Great time Radius isn't relevant to, say, Auto Guns.The checklist you find on this page is trimmed to only display stats that actually appear on the weapon. Nevertheless, it is definitely feasible that Bungie provides additional logic behind the scenes that further filter systems thesepossibilities to, for illustration, prevent specific products from getting able to possess an Influence masterwork. Until Bungie modifies the API data files to 100% accurately display which masterwork stats are feasible oneach item, get what you find here with a pinch of sodium.
